Please visit my new website: http://temeculahandymanservice.com
Past jobs pages in random order
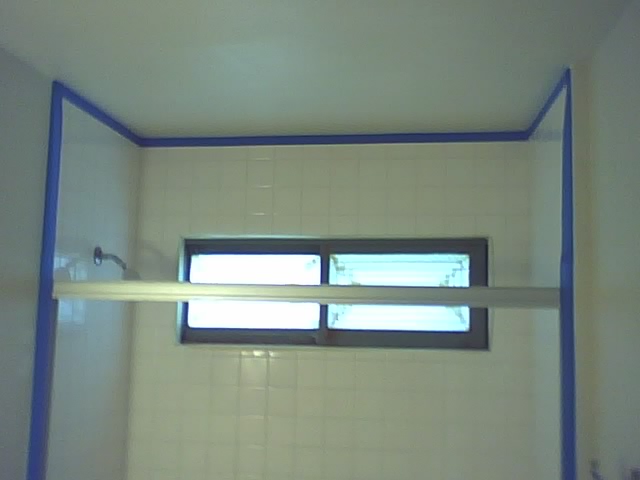
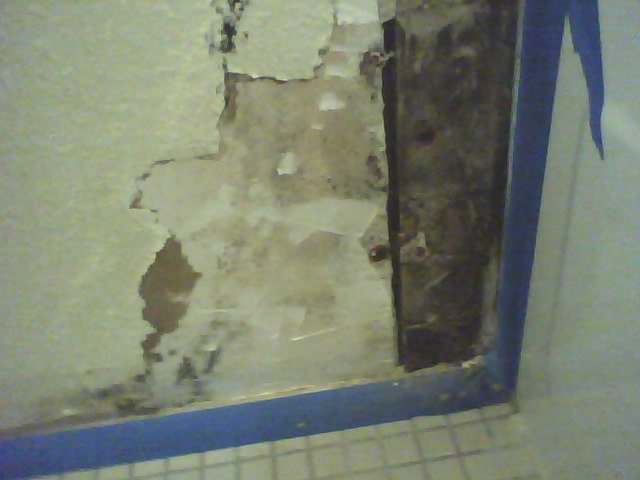
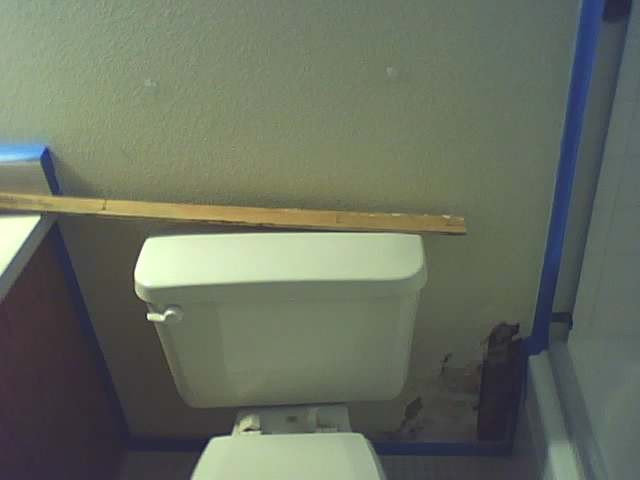
The following are some pics of a tiled bathroom that had bad grout, missing caulking, loose tiles and moldings. Although I was not paid to, I cleaned them up and made it look decent while I was there to fix a leak in the ceiling from the upstairs toilet and shower. The owners were very grateful.
Inclueded in these photos was a bathroom that had rusted through the bathtub's frame mount and had developed black mold that someone had covered up, I found it out easily and gave them several options for a proper repair. The apartment complex was not bothered to do the reoairs properly or pay me for the work I did there. I feel sorry for the next tenant that may develope a breathing disorder from the black mold spores they will inhale everytime they go to the john if they do not repair it properly.


The kitchen in the apartment above had several things wrong: 1st the cabinets were not properly mounted and were falling off the walls. 2cond the paint was a mixture of flat, semi-gloss and gloss on the same surfaces, 3rd the base and trim boards were full of holes, rotten or missing. I remounted the cabinets, replaced the caulking and missing trim, sanded-filled-primed and painted all the surfaces including the louvered door by hand. If a window looks bad it is due to the frame being unclean, rough, uneven, out of joint or discolored. I cleaned the ones in this apt by sanding the drywall lumps out, cleaning the metal, replacing the caulk and bending straight any deformations prior to sealing the metal with a clear resin enamel.
This principle also works on sliding glass doors, drawers, mirrors, screens, closet & cabinets. Now the only thing left is to clean the glass. They will also now slide open and closed with little effort and the locking mechanism will lose any quirks it had developed.
This mobile home below needed the carpet cleaned and restretched which some industry pros find impossible due to the floor vents or angled wall patterns. I have never seen an area I cannot repair or restretch to the manufacturers specifications so that the carpet will last the life of the home. Poorly installed carpet can cause several types of illness, premature breakdown of all appliances, doors, furniture, glass, painted surfaces or electrical items and make basic cleaning all but impossible to achieve. This is well know by industry pros but rarely admitted to due to their own need's. I can explain it better live or in person. Making seams dissapear is something I am very proud of and seems to be a dying art form. If you have a visible seam I can make it dissapear, no matter what the reason.


I easily stretched over 3 inches out of this living room. I have seen this self destructive installation method used in almost every home I have ever worked in and you would not believe the names of some of the professionals that leave your home in this poor of a condition. When it comes to installation there is only one way to do it, the right way. I guarantee I will do it right or I will not do it. If your carpeting can be picked up using two fingers pinching the nap and lifted more than one inch or it does not snap back to the padding, it is improperly installed and will not last. That means besides the obviouse it can affect your health and living conditions and will make your home permenently dusty, static heavy and impossible to keep clean. Ever wondered why some people seam to have the cleanest homes and never seem to have to deal with dust? It is not in the HVAC system or adding a humidifier. If the carpet is too loose it will create, hold and redistribute dust, dirt, mites and any airborn microbe brought into your home like it or not. Sanitizing twice daily will not get it clean. I have proof of all these facts, ask me for them.
I am adding this addendum to the floor covering guide to help quell a rising misnomer about RAMPING!!! It is never a good idea to ramp your floors period. It was never intended for ramping to become a standard of installation practice and when done was only to be for commercial applications not the home. This is where it all started, in certain commercial buildings like (hospitals- airports- schools- public offices they would have to abide city codes and handicap certificates requiring that all transitions have a slope or minimum of 1/4" rise per foot. Some concrete subfloors would not meet these requirements so when replacing the existing flooring that would transition into another type of floor (usually carpet to tile) the installer would be faced with a dilemma of too high a tile area that would have a trip hazard or the carpet would not tuck. To remedy this without having to replace the floor or raise the subfloor in the adjoining room someone came up with the idea to ramp (build up) the subfloor from one room to the next, Since the common installation was glue down carpet or the stretched in carpet was in giant rooms where ramping 6' along the entire wall was still preferable to raising the entire subfloor. It became a suitable substitute that most manufacturers could get behind However you cannot ramp a doorway that has tile more that 1/4" for every foot back and expect your residential stretched on carpet to hold up. Also most professional installers do not even know how to ramp correctly in a residence and these guys who claim it is an easy everyday occurrence in the industry are idiots and damaging your health- your home - the industry and the propagation of stupidity. If a tile installation is done correctly to begin with, it will be no more than 1/8"-1/4" higher than the tiles thickness off the subfloor. That being the case tucking stretched in carpet of any thickness or profile is possible and will make a nice transition without causing a trip hazard. Just needed to get this off my chest as so many tile layers are causing trouble by installing tile only on a backer board 1/2" thick then applying 1/2" thickness of mortar or glue for 1/2" tile that leaves the customer with a 2x4's difference in height to deal with when they are ready to put the carpet back. And to cover their assess they claim ramping is the industry standard to fix the problem. Well it is not, and the manufacturers will not stand by a warranty for carpet that is ramped in excess. You can legitimately ramp 1/8" to 1/4" per foot without harming the stretch but the ramping has to be along the entire wall in that room- that means if that ramp falls into another doorway it now needs to go along the wall in that room as well. Yes you can gradually feather it down if the wall is long enough but now you have a uneven floor and where baseboards are used it is apparent that something isn't right and or you may see the ramp like a pond or mound through the backing over time. Hire the right person and this will never be an issue.
Texture is very difficult to get right and impossible to film with a standard camera as you can see by the many shades of color of the same cieling pictures below. I can match any style, type, color, texture, plaster, clay, milk paint, enamel, latex, wood stain, rubber, vinyl, carpet, cloth, metal or any other surface you can think of and some you haven't, so that the repair cannot be seen. Walls are even easier be it a hole from a fist fight or door knob or a water leak as big as a car or as small as a dime I can repair it with very little effort or expense to you.


This was a challenge from the start because the house is not typically made changing several variables. First thing I was told is that the roof leaked and a musty smell was apparent. I removed the leaves blocking the gutters and cheaking for holes I noticed hundreds of acorns shoved under the roofing tiles. During the removeal process I aslo noticed some split tiles and that new nuts were being inserted during the night. I siliconed the tiles down and resealed some flashing that had come loose. Noticing that the tar had been fractured around a sky light I retard the tiles around it. Although the roof looked nicer it did not resolve the leaking, So I went to the next suspect, the windows where water was showing its mark from.


Window Problems
Most problems that can be associated to windows or doors are as varied as the windows and doors themselves. The above home had been re-fitted with new custom windows but they were not properly installed. Oh they looked ok, they seamed to be installed the right way and didn't show any signs of a problem for a few years. If it had not been for the severe few weeks of rain we saw here in Temecula from march to april 2010 the problem would still not have been noticed and the owner would still be getting sick for no known reason. You see the inside flange of the window was never installed, (still on the freeway I imagine) the paper barrier was not properly replaced, the drip edge was the wrong type, the frame boards were crooked, had large gaps and the window was screwd into the new frame boards right through the exposed painted metal frame and sill. All of these things were wrong but the drip edge, missing flange and paper was causing the water leak problem. When it rained about a gallon of water would seep in past the drip edge of this 5' x 5' window frame within four hours. I took measurments and timmed the drips over two days.
Inside the home water would pass right past the outside flanges and since there was no paper to stop it, there it would sit and collect on the upper sill plate just under the beam. Then with no flange would continue to collect until enough built up to soak into the drywall and the wood beams and studs. It would collect during a good rain to soak through to the drywall but would evaporate before reaching the clay (instead of paint) covering on the inside. The water that was allowed to get into the wood was attracting termites and the water that was soaking into the drywall was starting to germinate black mold (the most deadlist of fungi) to form between the drywall and the wood. Thankfully for the Tenant who was becomming ill every other day and was seeing a physician to no avail, it rained hard for three days straight allowing enough water to collect and pass into the clay to form little trails like a river in sand. After removing the clay I saw the rotting drywall. After removing the drywall I saw the mold. After removing the mold I could see the missing paper barrier and flage pieces. I also saw the poor way the window was installed. Normally we would have needed to start over with new windows as the manufacturer will typically not sell you the flanges separately, but since My friend was just a tenet and money was an issue we opted to correct the problem another way. I removed the mounting screws and releveled the window frame boards. I then remounted the window and placed shims on all sides to give it strength to prevent movment from use or settlement. Then to replace the missing flange and paper I filled in all gaps with spray foam insulation that also creates a water proof barrier. After I used gypsum patch to fill the gaps left from improper framing techniques, I replaced the drywall with new then applied primer and finally the clay. I sanded off the mold and old paint off the beam, studs and trim boards to save material costs but a few trim boards were too severe to save and had to be replaced. New trim never matches exactly with the old and in this case the thickness was the issue so the corners were not going to match exactly. I placed those pieces on the bottom where the difference would be less noticable then sanding the edges rounding corners most vertical lines matched up and you could not tell. To do that I had to splice several pieces together then fill in all splices with wood putty. After the putty dried I finished sanding and primed and painted. The last step was the clay then cleaning up. I would not suggest using this method as I spent over 80 hrs doing the job this way mearly to save the customer $500.00 material costs. It would have been cheeper to replace everything with new in the end. But the window will not leak again and it looks better than when it was first installed so the owner and tenet are very happy. I on the other hand worked hard for over 80 hrs for just $75.00 if you calculate $5.00 in gas round trip and 8 dollars an hour at 8 hrs a day, I paid them to do this job. If the Tenant had not been a close friend he would still be getting sick from mold poisoning. I will have to charge more for the other window.


Water leaks are the number one cause of major reconstruction next to fires and earthquakes. I can repair any type of plumbing problem for less than anyone else. The home below wanted to replace all the outside water spigots due to the age as they were all starting to leak. One of them was attached to a metal pipe that was connected to a pvc pipe illegally. The PVC was cracked and leaking in the ground. A simple elbow replacement sloved the propblem and will prevent future breakage.


Currently I am painting my truck so it does not look so ragged. Let me know what you think of it.


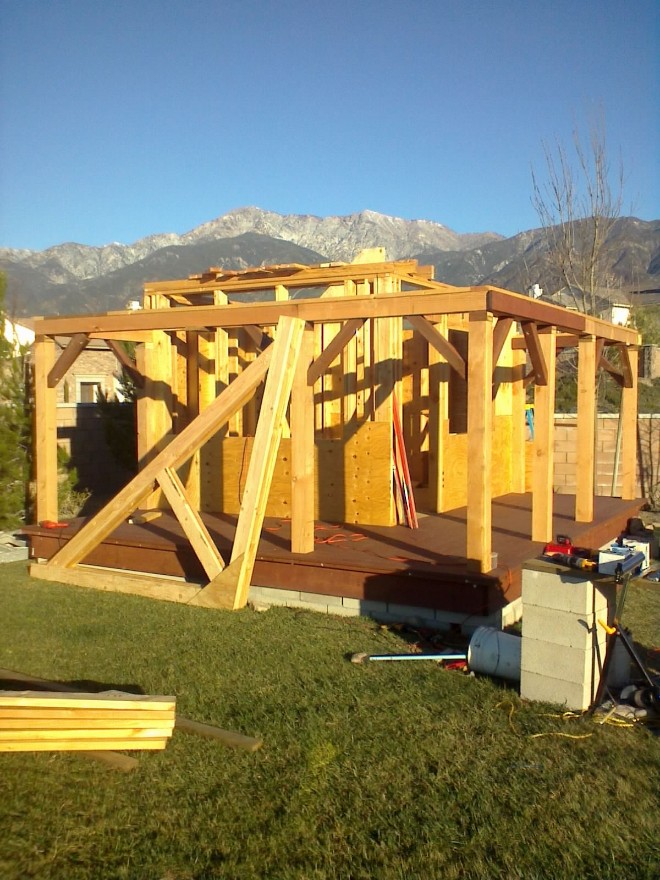
I will have to decribe what was done to the shed in the slides below as we did not take photos during construction. This shed was about to collapse and the doors had fallen off the hinges. Looking at it now you would think it was suitable to live in, and you would be right. In the future I plan to run power and water. The first slide show were Pictures before major construction, mostly cleaning and prep work. Next set shows the pictures after all work was done and the shelving and cabinets were filled up with materials from a storage room as big as a two door garage. Everything that was originally in the shed fit in one side of the new interior shelving. 1st I weeded and cleaned the debris, then piled all the contents to one side. Next we removed the doors and lifted the metal as on unit off the foundation and braced it to withstand the wind while the new 2' base was built. The original foundation was too small so we used stakes to secure the new base plates of the new walls. They were made from standard 2" x4"s and plywood siding. The unit was then lifted onto the new wall base and secured. The metal frame was straightened and reinforced with angle iron. New 2"x 4" shelving was built on both interior walls and a cabinet was hung on the very back wall above a desk high shelf or work space (depending on the owners needs) The roof was rienforced with wood framing including a section to mount an interior flourescent 4' light fixture. New framework was installed to incorporate (2) exterior doors with a latch lock for the RH and a deadbolt set for the LH side. The roof was remolded to allow a new plexiglass awning on the sides and rear while the front was extended vertically to carry a 12' x 3' awning. A sensor lamp was attached to the front under the awning. New 2" x 2" framing was built for the side and rear awnings. They were supported with a steel angle pieces attached to the walls above head height and a 4' x 8' double door cabinet was built on the LH side. A new deck was built for the sides and rear where desks and shelves were stacked for a wide array of objects. A steel rack was attached to the LH side rear to hold gardening tools: Several shovels, rakes, axes, chainsaws and trimmers. The roof and walls were painted and sealed. An electrical service line was attached to the back under the deck that will run up the wall and feed the lights and four outlets inside and two outside. Their were three firewood boxes built in back and the grade was leveled on all sides.


I am working on another shed but you will think this one is a small house, just a few sample pics for now I will post a slide show when we finish the job.